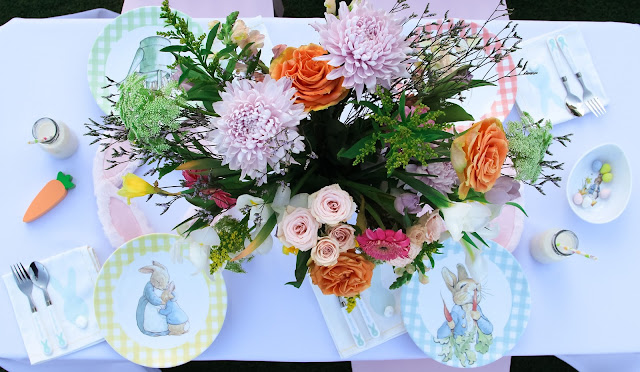
Fresh flowers can elevate the look of any party or event. I rarely have a party without flowers but gorgeous arrangements can be very expensive. The good news is, it's not as hard as it looks to DIY and it will save you tons of money, especially if you host a lot of parties. I usually go the fail safe route and do one color roses, hydrangeas, or peonies, leaves removed, in a tall vase, cut to sit just above the rim. It's clean, classic, and beautiful. Once in a while I would mix a few different types of flowers but I always stayed with safe options.
Then when styling this party for Pottery Barn Kids, I decided I wanted something really elaborate and beautiful, unlike anything I had done before. And by the time I decided that was what I really wanted, it was too late to order anything and I was forced to DIY it. I was super nervous but I love how it turned out and I wanted to share my tips with you.
First of all, I was very intimidated to attempt this but I found that just jumping in and doing it, it wasn't nearly as difficult as I pictured it would be.
How to make a DIY Flower Arrangement in 5 Easy Steps:
1. Find Inspo: For your first few arrangements, I would recommend basing it off of a photo {try instagram or pinterest} of another arrangement that you really like. It doesn't need to be the same colors and flowers but having a shape and look in mind when purchasing your vase and flowers is really helpful. Make sure you continuously rotate your arrangement as you are doing it so that it looks good from all angles.2. Buying Flowers: You're going to need more flowers than you think. I bought 9 bunches of flowers not expecting to use them all and then I ended up using almost all of them! My favorite places to buy flowers are Trader Joes and Whole Foods. I definitely recommend buying bunches of flowers by type and not bouquets of different types of flowers mixed together by the store florist. You want to be able to mix your own flowers. Decide on the colors you want to get that coordinate well together, this is key. To create something like this one, you will need one big, fabulous, expensive looking flower like peonies, garden roses, roses, or ranunculus. And then build the rest off of whats available that color coordinates. You also need lots of tall, skinny, fillers which is the key to that messy, boho vibe.
3. Floral foam is the secret to success: You can get it at Michaels for pretty cheap. Make sure you get the WET floral foam because dry floral foam will not work but they do look very similar so keep this in mind when you are purchasing. It's green so a non-clear vase will work best for something like this.
4. The vase: I really pushed this vase to it's limits as I'm pretty sure I can't fit another flower in there anywhere but it works and had it been any bigger I would have needed even more flowers to fill it up. Keep the vase or vessel size in mind when purchasing it as well as the flowers that go in it. Craft stores and home stores like Home Goods are the best places to find pretty vases.
5. Go For It: There is no DIY that is going to be able to tell you step by step where to place each flower, unfortunately. Place the foam in the vase {cut it if needed} and add water until it's almost to the top and just dive in! Start building it based off the photo you chose, varying heights, and play with it as you go. You can easily move and re-do things if needed so don't be intimidated. The best advice I have is to start with the tall flowers at the top and work your way down to the shorter ones at the bottom on the arrangement. Then build it out sideways if you like, like I chose to here. There's no hard and fast rules, just take your time and space out the same type of flower all throughout so there's not a clump of all the same flowers in the same spot anywhere and just go for it. You'll be amazed at what you can create.
To make your Fall shopping a little bit easier, I've teamed up with a group of bloggers to give you
a chance to win a $700 REVOLVE Gift Card!
a chance to win a $700 REVOLVE Gift Card!
To enter: complete the steps in the rafflecopter below. The more steps you complete,
the more entries you receive, and the better your chance at winning!
This giveaway runs until Tuesday, September 11th at 12am PST
the more entries you receive, and the better your chance at winning!
This giveaway runs until Tuesday, September 11th at 12am PST
Winner will be announced here. Good Luck!
*this giveaway is in no way sponsored by REVOLVE.
*this giveaway is in no way sponsored by REVOLVE.


