HOW TO INSTALL YOUR TEMPAPER WALLPAPER
So if you follow me on snapchat {celebrationstyl}, you probably already know that we re-did our floors and kitchen recently. You also probably saw me installing this wallpaper! {also on instastories @celebrationstylist} The back of the kitchen wall is now our entrance wall. Ever since I put gift wrap up on that wall while under construction, during my Brunch After Dark party, I have been completely sold on the idea of wallpapering this wall. It's the perfect statement right when you walk in. So I contacted Tempaper because I wanted to be able to do it myself, I didn't want anything permanent (because removing wallpaper is a big undertaking should I change my mind about the pattern at some point), and I definitely had to have it done in time for my Flatly Fete party that I was hosting. I emailed them my top 2 choices so they could help me decide, which was between Stripes and the one I ultimately chose, Marrakesh. I wasn't sure which one I wanted and the sweet girl that helped me recommended Marrakesh and I am so glad she did, as I am now in love with it.
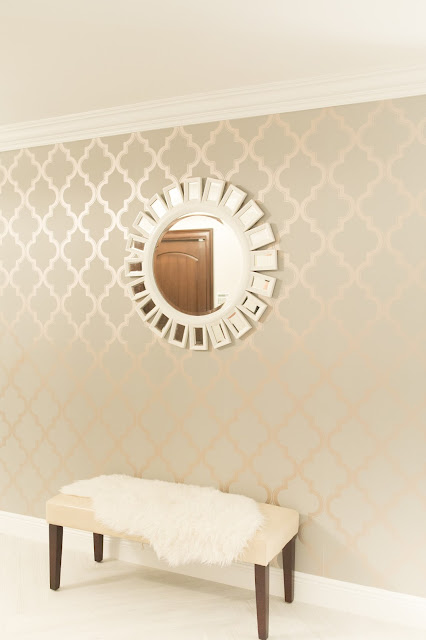
I had just gotten home from a 3 hour road trip when I saw the Tempaper package had arrived and immediately ripped it open and got to work, I was so excited. There's no photographic evidence of my install because I looked a hot mess and because I didn't really want my butt on camera ;-) But I really did do it all by myself! I will be honest, I was very intimidated and definitely made some mistakes and even had to take a panel down after putting it up crooked (but in my defense, none of my walls are completely straight and level) but after I successfully installed the first Tempaper panel, the rest was a breeze!! The biggest tip I have is to take the outlet covers off before you even start, it will make everything easier and install prettier. And have an xacto knife to cut around those and the moulding, it made that step super simple. The whole wall took less than an hour, even my husband was impressed. I loved the way it turned out!! I was pretty proud of myself for putting it up. If you've considered buying it yourself, it really is pretty easy to install. The pattern is pretty gray, similar to the other walls in my house with a gorgeous bronze/gold metallic to the design. I am still on the hunt for the perfect furniture for this space but I think this white z-gallerie mirror is living it's best life here now. The wall was the perfect backdrop for photos at my event, and even though it's "temporary" I have no plans to take my Tempaper wallpaper down anytime soon. Check out my before and afters.


No comments
Post a Comment